[Isaac Lab Part 1] Unitree Go2 URDF 불러오기
Isaac Lab asset config와 custom script를 이용해 Unitree Go2를 Isaac Sim scene에 배치하는 과정을 정리한다.
Isaac Lab 실습의 첫 단계로 Unitree Go2를 Isaac Sim scene에 불러왔다. 설치 과정 자체보다는 Isaac Lab이 제공하는 robot configuration을 이용해 custom script에서 로봇 asset을 생성하는 흐름에 초점을 맞췄다.
1. Isaac Lab 설치와 asset config
Isaac Lab은 로봇별 asset config를 제공하므로, URDF를 매번 직접 손보지 않아도 미리 정의된 articulation 설정을 가져와 scene에 배치할 수 있다. 설치는 공식 문서의 binaries installation 절차를 기준으로 진행했다.
2. Custom script 작성
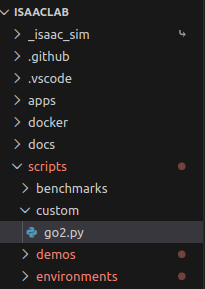
scripts/tutorials/00_sim/create_empty.py의 빈 scene 생성 흐름과 scripts/demos/quadrupeds.py의 quadruped 로딩 예제를 참고해, custom 폴더 안에 Go2를 불러오는 Python script를 만들었다.
1
2
3
4
5
6
7
8
9
10
11
12
13
14
15
16
17
18
19
20
21
22
23
24
25
26
27
28
29
30
31
32
33
34
35
36
37
38
39
40
41
42
43
44
45
46
47
48
49
50
51
52
53
54
55
56
57
58
59
60
61
62
63
64
65
66
67
68
69
70
71
72
73
74
75
76
77
78
79
80
81
import argparse

from isaaclab.app import AppLauncher

# create argparser
parser = argparse.ArgumentParser(description="go2 scene")
# append AppLauncher cli args
AppLauncher.add_app_launcher_args(parser)
# parse the arguments
args_cli = parser.parse_args()
# launch omniverse app
app_launcher = AppLauncher(args_cli)
simulation_app = app_launcher.app

"""Rest everything follows."""
import numpy as np
import torch
import isaaclab.sim as sim_utils
from isaaclab.assets import Articulation

from isaaclab.sim import SimulationCfg, SimulationContext
from isaaclab_assets.robots.unitree import UNITREE_GO2_CFG


def main():
    """Main function."""

    # Initialize the simulation context
    sim_cfg = SimulationCfg(dt=0.01)
    sim = SimulationContext(sim_cfg)
    # Set main camera
    sim.set_camera_view([2.5, 2.5, 2.5], [0.0, 0.0, 0.0])
    # Ground-plane 생성
    cfg = sim_utils.GroundPlaneCfg()
    cfg.func("/World/defaultGroundPlane", cfg)
    # Lights
    cfg = sim_utils.DomeLightCfg(intensity=2000.0, color=(0.75, 0.75, 0.75))
    cfg.func("/World/Light", cfg)

    # go2 articulation을 로드합니다.
    go2 = Articulation(UNITREE_GO2_CFG.replace(prim_path="/World/go2"))

    # 로봇 데이터에 접근하기 전에 simulator를 먼저 실행해줍니다.
    #
    '''Articulation 객체가 완전히 유효한 시뮬레이션 데이터를 담기 위해서는
      객체 생성 후 시뮬레이션이 최소 한 번 재설정(Reset)되거나 스텝(Step)이 수행되어야 합니다.'''
    sim.reset()

    root_state = go2.data.default_root_state.clone()
    # 로봇의 초기 pose의 위치와 방향을 입력해줍니다.
    go2.write_root_pose_to_sim(root_state[:, :7])
    # 로봇의 속도, 가속도를 입력해줍니다.
    go2.write_root_velocity_to_sim(root_state[:, 7:])
    joint_pos, joint_vel = go2.data.default_joint_pos.clone(), go2.data.default_joint_vel.clone()
    # 로봇의 초기 joint state를 입력합니다.
    go2.write_joint_state_to_sim(joint_pos, joint_vel)
    # 로봇을 reset하여 로봇의 이전 상태에 대한 정보를 없앱니다. (강화학습을 위해)
    go2.reset()

    # generate random joint positions
    joint_pos_target = go2.data.default_joint_pos
    # apply action to the robot
    go2.set_joint_position_target(joint_pos_target)
    # write data to sim
    go2.write_data_to_sim()


    # Now we are ready!
    print("[INFO]: Setup complete...")

    # Simulate physics
    while simulation_app.is_running():
        # perform step
        sim.step()


if __name__ == "__main__":
    # run the main function
    main()
    # close sim app
    simulation_app.close()
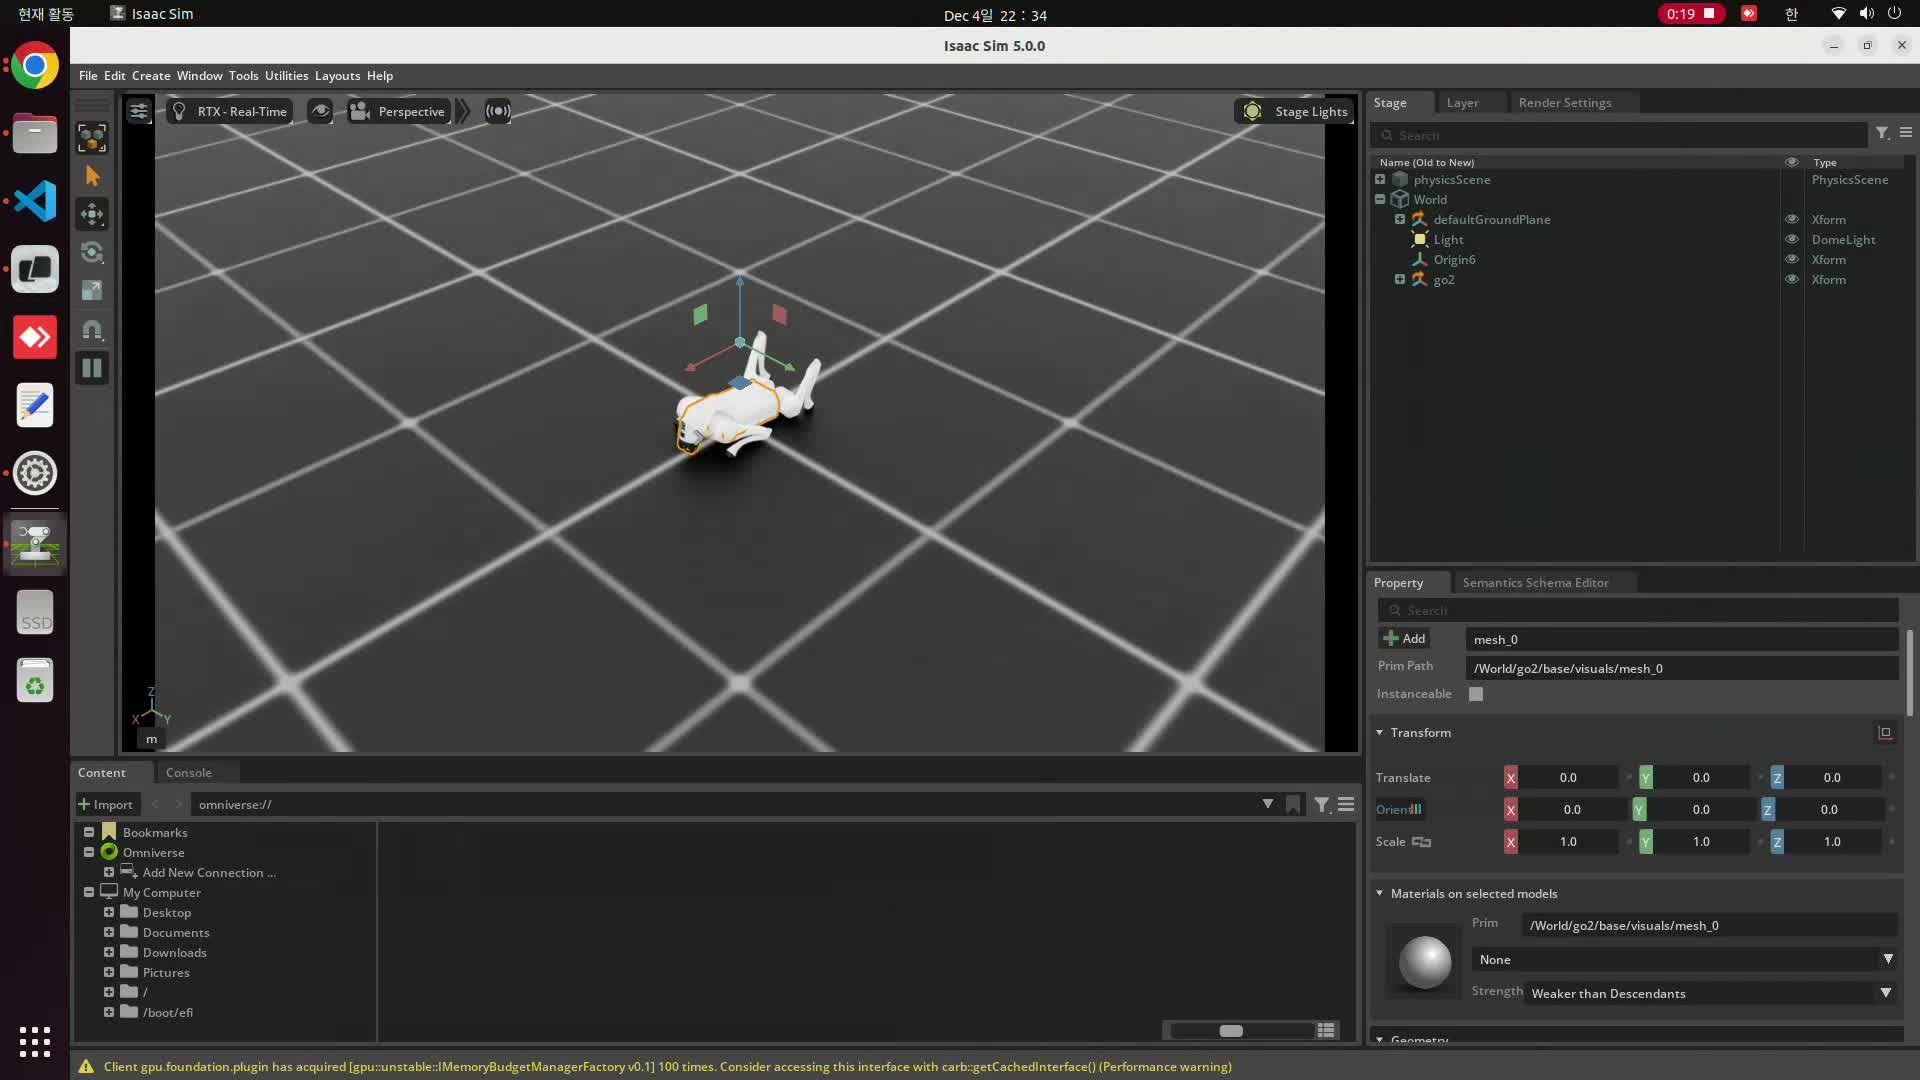
초기 joint pose를 넣어도 별도의 standing policy나 지속적인 제어 입력이 없으면 로봇은 중력과 접촉에 의해 자세를 잃는다. 따라서 이 단계의 결과는 “정적으로 서 있는 로봇”이 아니라, Go2 asset이 Isaac Sim에 정상적으로 올라오고 물리 시뮬레이션에 참여하는지 확인하는 데 의미가 있다.