Isaac Sim ROS2 Tutorial 1: TurtleBot3 /cmd_vel 주행 연결
TurtleBot3 URDF를 Isaac Sim에 import하고 ROS2 /cmd_vel을 바퀴 joint velocity command로 연결한다.
Isaac Sim에서 ROS2 bridge 흐름을 처음 확인하기에는 TurtleBot3가 가장 단순하다. 이 글에서는 TurtleBot3 Burger URDF를 Isaac Sim에 import하고, ROS2 /cmd_vel 메시지가 OmniGraph를 지나 바퀴 joint velocity command로 바뀌는 과정을 정리했다.
1. TurtleBot3 URDF 준비
ROS2가 source된 터미널에서 TurtleBot3 패키지를 받는다.
1
git clone -b $ROS_DISTRO https://github.com/ROBOTIS-GIT/turtlebot3.git turtlebot3

이번 실습에서 사용할 URDF 경로는 다음과 같다.
1
turtlebot3/turtlebot3_description/urdf/turtlebot3_burger.urdf

이미 Isaac Sim용 USD 로봇이 있다면 이 단계는 생략할 수 있다. 여기서는 ROS2 bridge와 OmniGraph 연결을 직접 확인하기 위해 공식 TurtleBot3 Burger URDF를 기준으로 진행했다.
2. Isaac Sim 환경 만들기
Content Browser에서 Simple Room asset을 stage에 올려 테스트 공간을 만든다.
1
Isaac Sim/Environments/Simple_Room/simple_room.usd
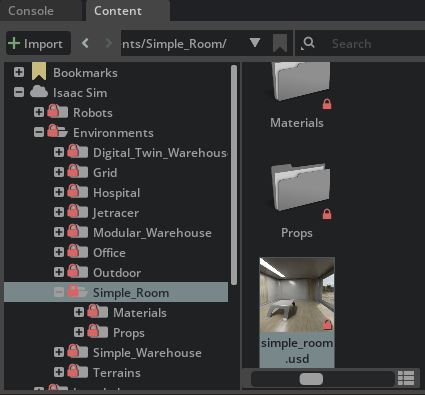
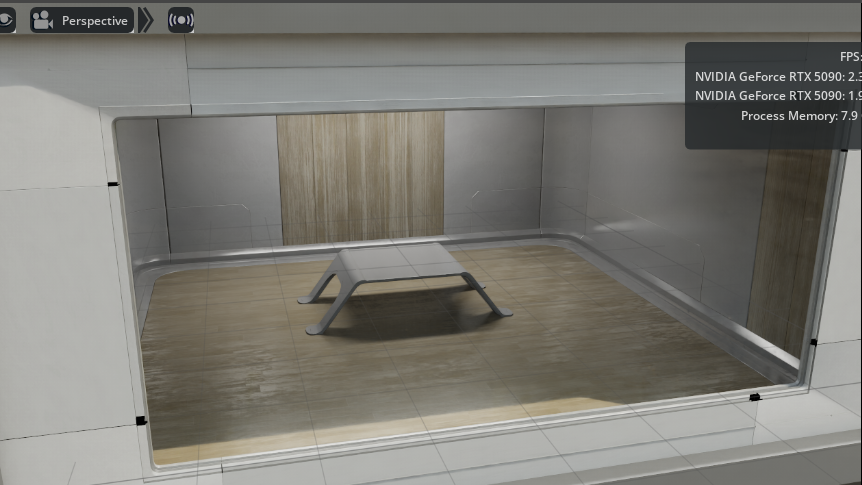
원점 근처에 배치하면 이후 robot 위치와 camera view를 맞추기 쉽다.
3. URDF Import 설정
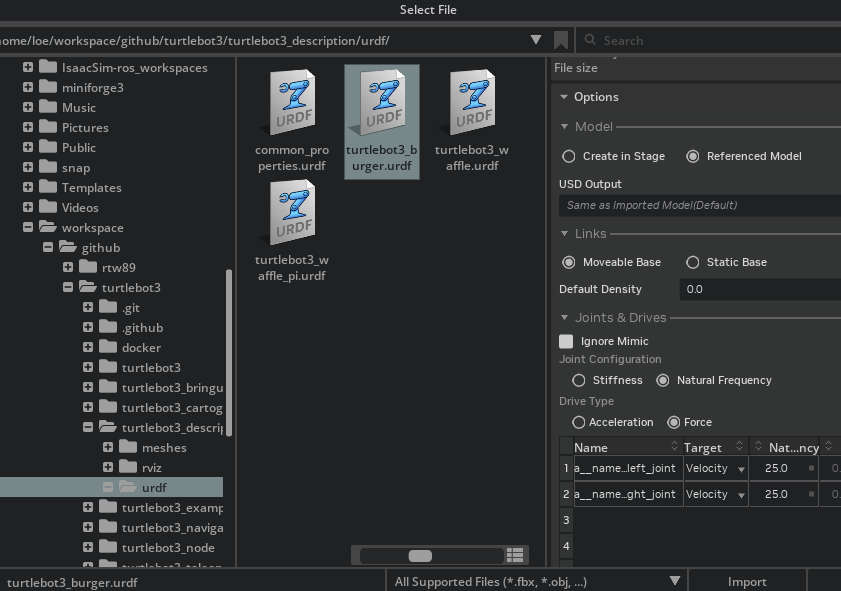
상단 메뉴의 File > Import에서 turtlebot3_burger.urdf를 선택하고 import 옵션을 확인한다.
Links는Moveable Base로 둔다.- wheel joint의 drive target은
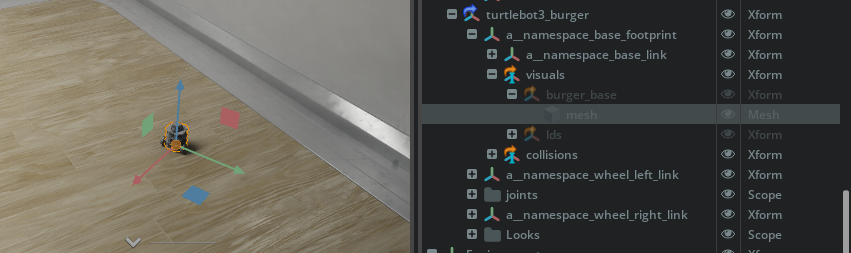
Velocity로 설정한다. - import 후 stage tree에서 실제 prim 이름과 wheel joint 이름을 확인한다.
4. 바퀴 Joint 물리 설정
왼쪽과 오른쪽 wheel joint의 damping 값을 크게 설정해 velocity command를 빠르게 따라가도록 한다. 반응이 느리거나 미끄러짐이 크면 먼저 이 값을 확인한다.
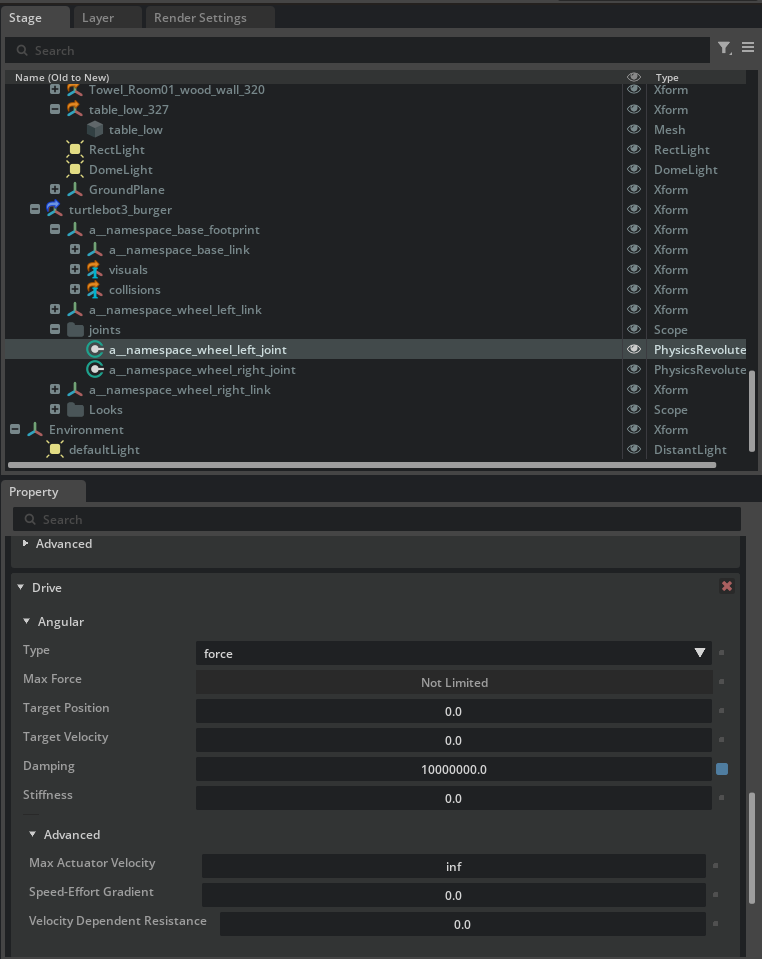
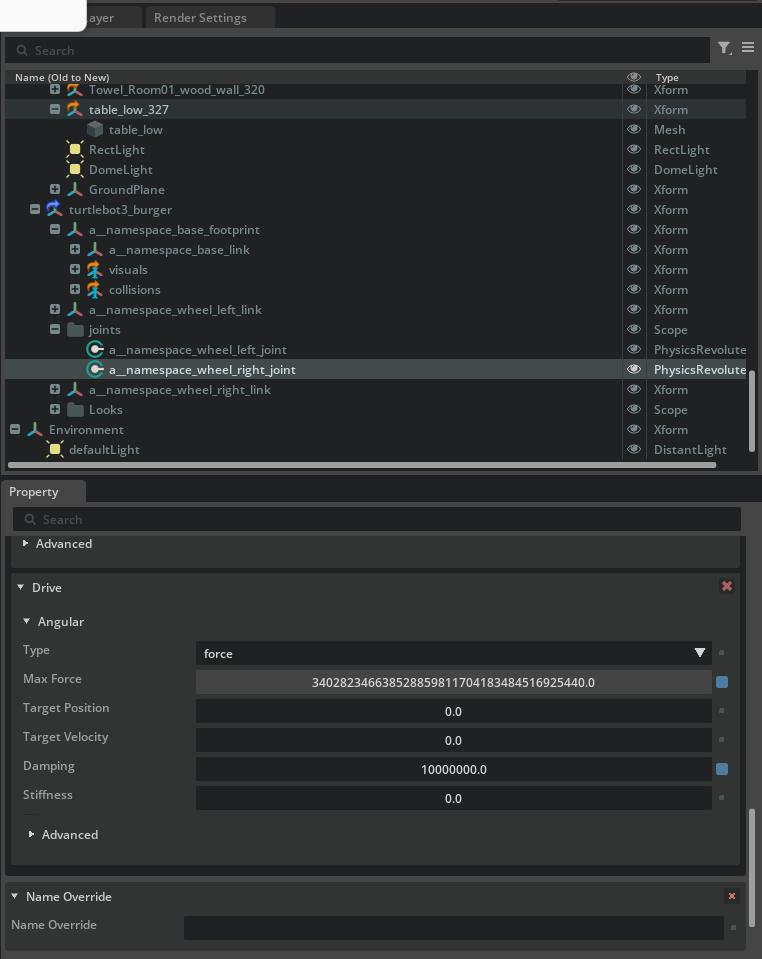
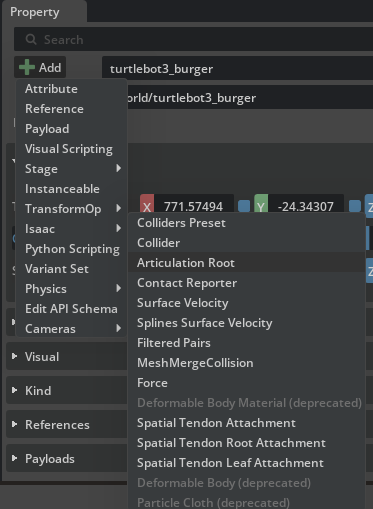
root prim에는 Rigid Body, Mass, Articulation Root 속성이 필요하다.
1
2
3
4
ROS2 Subscribe Twist
  -> Scale To/From Stage Unit
  -> Differential Controller
  -> Articulation Controller
5. OmniGraph 제어 흐름
/cmd_vel의 Twist message를 바로 joint에 넣지 않고, Differential Controller를 거쳐 양쪽 wheel velocity로 바꾼다.
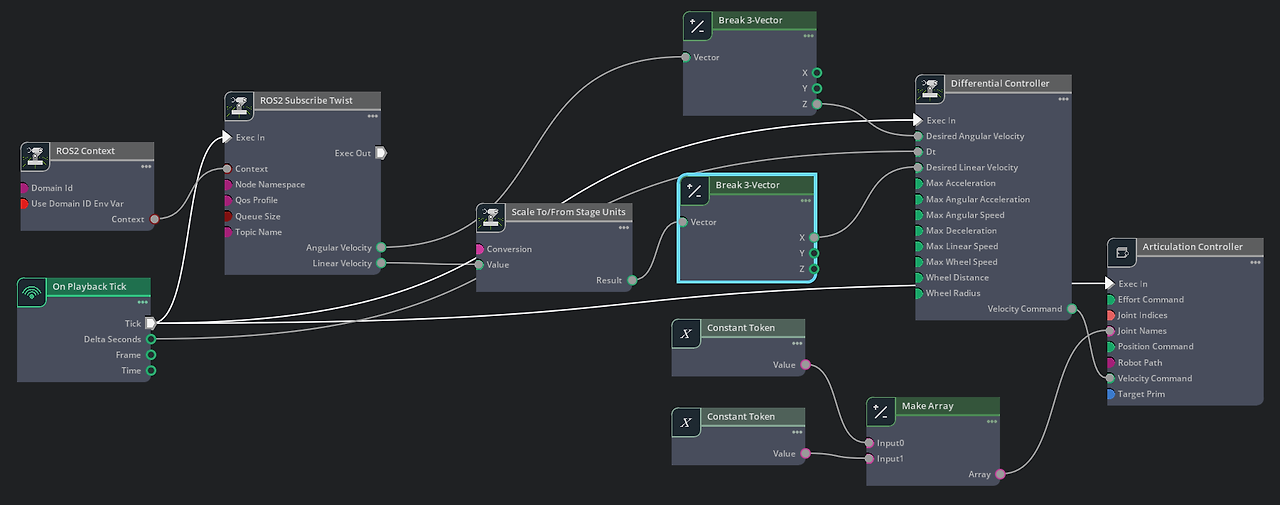
| 노드 | 역할 |
|---|---|
| On Playback Tick | 시뮬레이션이 재생 중일 때 매 tick 실행 신호를 만듭니다. |
| ROS2 Context | ROS_DOMAIN_ID를 포함한 ROS2 통신 컨텍스트를 만듭니다. 기본값은 0입니다. |
| ROS2 Subscribe Twist | /cmd_vel topic에서 Twist 메시지를 구독합니다. |
| Scale To/From Stage Unit | 입력 속도를 stage 단위에 맞게 변환합니다. |
| Differential Controller | 선속도와 각속도를 왼쪽, 오른쪽 바퀴 속도로 변환합니다. |
| Articulation Controller | 계산된 joint velocity command를 실제 articulation joint에 전달합니다. |
ROS2 Subscribe Twist의 topic name은 /cmd_vel로 맞춘다.
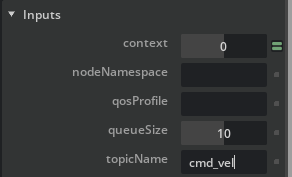
6. Differential Controller 파라미터
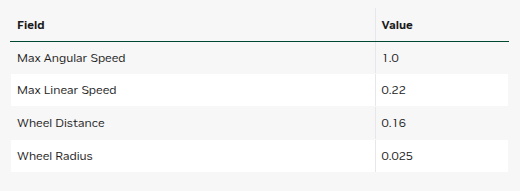
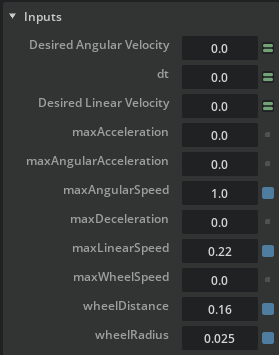
Differential Controller에는 wheel radius와 wheel distance가 필요하다. 이 값이 맞지 않으면 실제 이동 속도와 회전 반경이 예상과 다르게 나온다.
7. Articulation Controller 연결
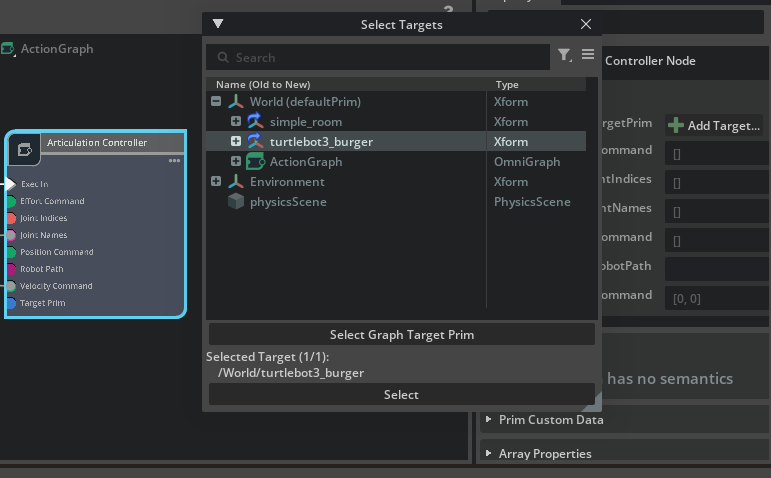
Articulation Controller에는 제어 대상 articulation root와 wheel joint 이름을 넣는다. URDF import 과정에서 namespace가 붙었다면 stage에 보이는 이름을 그대로 사용한다.
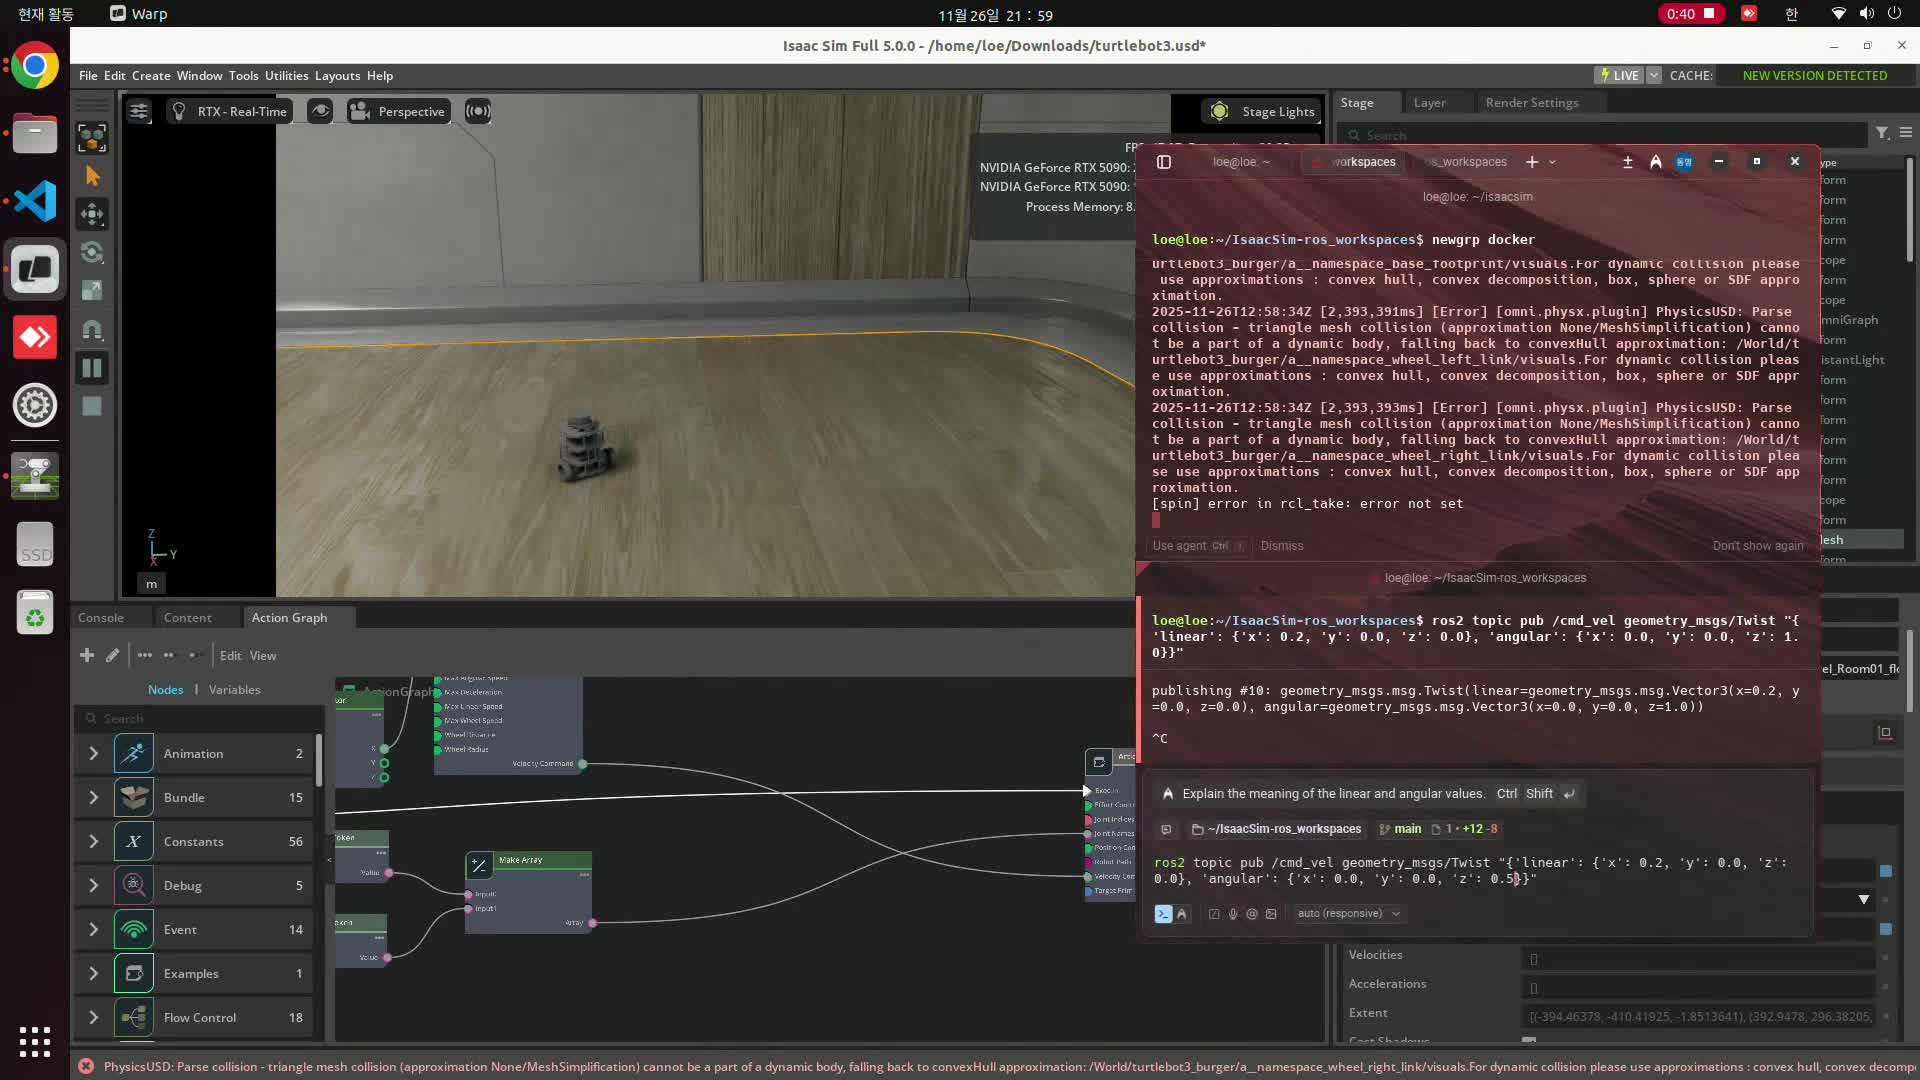
8. ROS2 연결 확인
stage를 play한 뒤 ROS2 터미널에서 topic list를 확인한다.
1
ros2 topic list

이후 Twist message를 publish해 robot이 움직이는지 확인한다.
1
ros2 topic pub /cmd_vel geometry_msgs/Twist "{'linear': {'x': 0.2, 'y': 0.0, 'z': 0.0}, 'angular': {'x': 0.0, 'y': 0.0, 'z': 1.0}}"
9. 정리
이번 실습의 핵심 흐름은 다음과 같다.
1
2
3
4
/cmd_vel
  -> ROS2 Subscribe Twist
  -> Differential Controller
  -> wheel_left_joint, wheel_right_joint
이 구조를 이해해두면 이후 camera, lidar, TF, odometry를 붙일 때도 같은 패턴으로 확장할 수 있다. ROS2 Context, helper node, target prim 지정이 Isaac Sim ROS2 graph의 반복되는 기본 구조다.