Isaac Sim ROS2 Tutorial 5: Publish Rate와 QoS 조정
Isaac Sim ROS2 OmniGraph에서 publish rate, frame skip, QoS profile, static publisher를 설정한다.
앞선 Isaac Sim ROS2 글들이 topic을 만드는 데 초점을 맞췄다면, 이번 글은 publish rate와 QoS를 조정하는 방법을 다룬다. 실제 로봇 시스템에서는 topic이 존재하는 것만으로 충분하지 않고, 얼마나 자주 publish되는지와 subscriber가 어떤 delivery 조건으로 받는지도 함께 맞춰야 한다.
1
/World/turtlebot3_burger/base_footprint/base_link/imu_link
1. Publish Rate와 Simulation Tick
대부분의 ROS2 OmniGraph는 On Playback Tick에서 시작한다. 이 tick은 simulation frame마다 실행되므로, 별도 제어가 없으면 publisher 주기는 simulation rate에 묶인다. rate를 낮추려면 graph 실행 빈도를 줄이거나 sensor helper가 frame을 건너뛰게 해야 한다.
2. Isaac Simulation Gate로 IMU Rate 조절
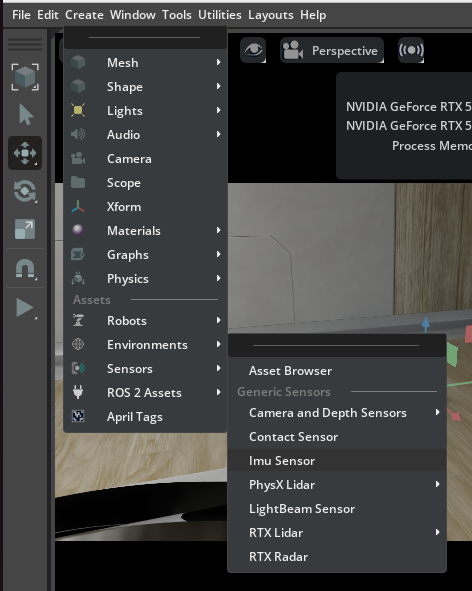
TurtleBot의 IMU link 아래에 IMU sensor를 추가하고, 같은 위치에 Action Graph를 만든다.
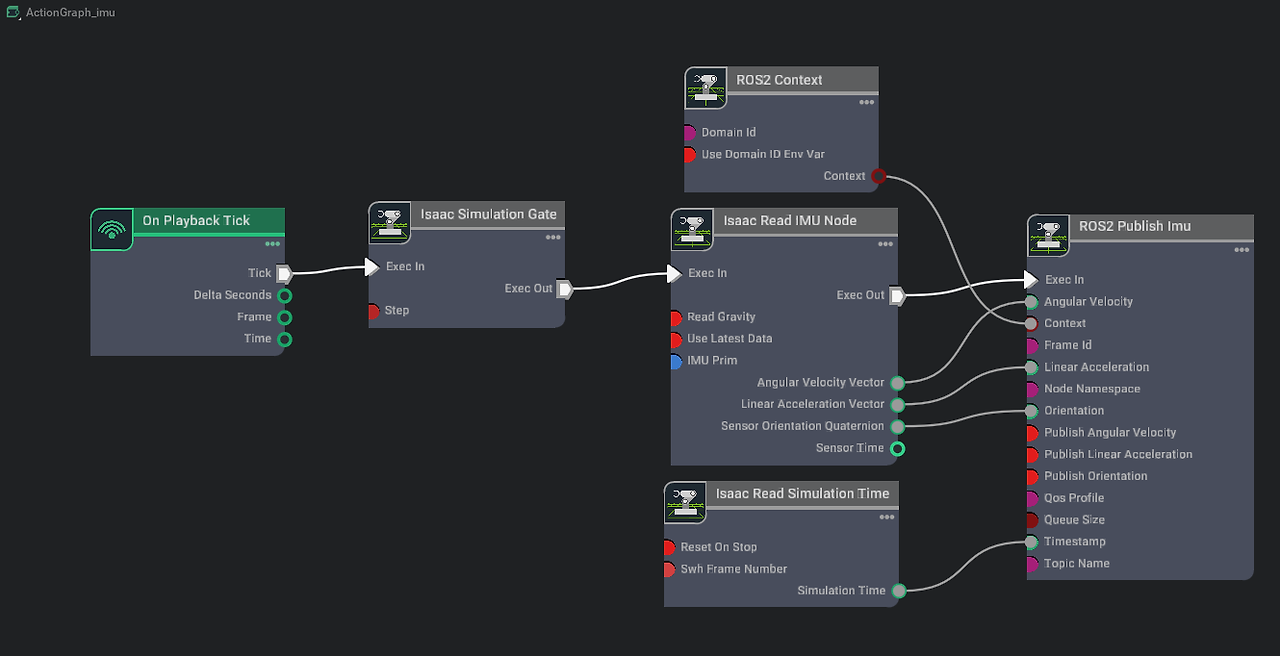
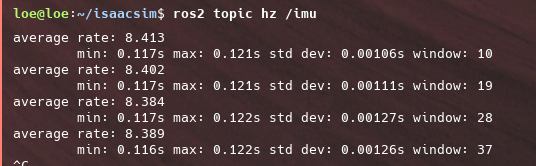
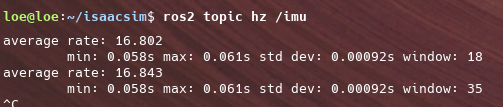
Isaac Simulation Gate의 step 값을 2로 설정하면 downstream node가 두 frame마다 한 번 실행된다. simulation이 60 FPS라면 IMU publish rate는 대략 30 Hz가 된다.
3. topic hz로 확인
ROS2 터미널에서 rate를 확인해 gate 설정이 실제 topic 주기에 반영됐는지 본다.
1
ros2 topic hz /imu
4. Camera와 Lidar Helper의 Frame Skip
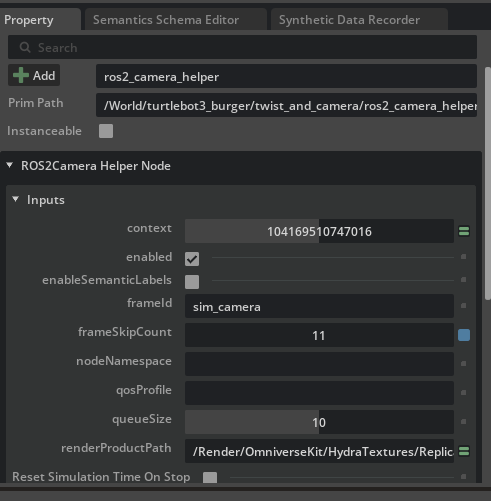
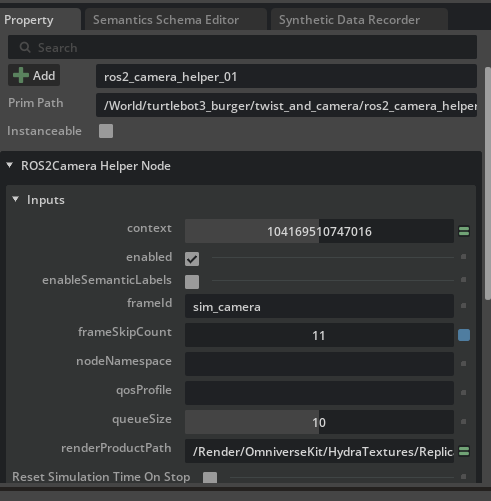
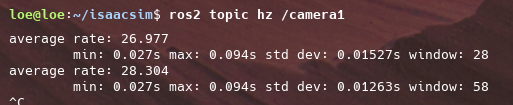
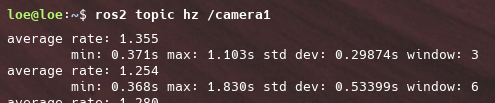
Camera나 Lidar helper는 graph tick을 줄이지 않아도 helper 내부의 frame skip 설정으로 publish 주기를 낮출 수 있다. 센서는 렌더링 비용이 크기 때문에, 실제 필요한 rate만 publish하도록 조정하는 편이 안정적이다.
1
publish rate = simulation rate / step
5. Simulation Rate 자체 변경
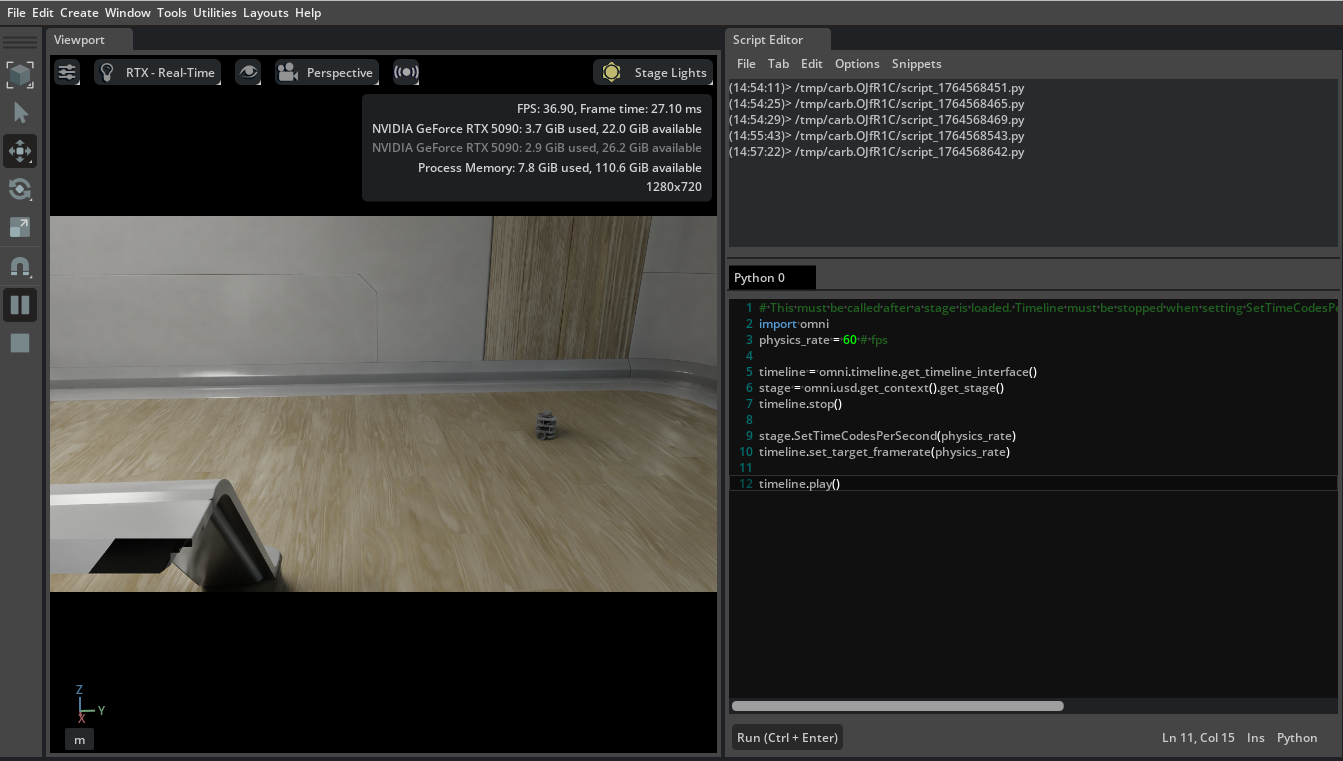
시뮬레이션 전체 rate가 요구사항과 맞지 않으면 physics step이나 rendering interval을 조정할 수도 있다. 이 방식은 전체 graph와 sensor 주기에 영향을 주므로, topic 하나만 조정할 때보다 영향 범위가 크다.
1
2
3
4
5
6
7
import carb

physics_rate = 60
carb_settings = carb.settings.get_settings()
carb_settings.set_bool("/app/runLoops/main/rateLimitEnabled", True)
carb_settings.set_int("/app/runLoops/main/rateLimitFrequency", int(physics_rate))
carb_settings.set_int("/persistent/simulation/minFrameRate", int(physics_rate))
1
2
3
4
5
6
7
8
9
10
import omni

physics_rate = 60
timeline = omni.timeline.get_timeline_interface()
stage = omni.usd.get_context().get_stage()

timeline.stop()
stage.SetTimeCodesPerSecond(physics_rate)
timeline.set_target_framerate(physics_rate)
timeline.play()
| 정책 | 의미 |
|---|---|
| History | message를 얼마나 보관할지 정합니다. keepLast와 keepAll이 있습니다. |
| Depth | keepLast일 때 queue에 보관할 최대 message 개수입니다. |
| Reliability | bestEffort는 빠르지만 손실 가능성이 있고, reliable은 전달 보장을 우선합니다. |
| Durability | volatile은 새 subscriber에게 과거 message를 주지 않고, transientLocal은 publisher가 보관한 message를 나중에 연결된 subscriber에게도 줍니다. |
6. ROS2 QoS 설정
QoS는 message를 얼마나 안정적으로, 얼마나 오래 보관하며, 어떤 history 정책으로 전달할지 정한다. 센서 데이터는 최신성이 중요하고, static 정보는 늦게 붙은 subscriber도 받아야 하는 경우가 많다.
1
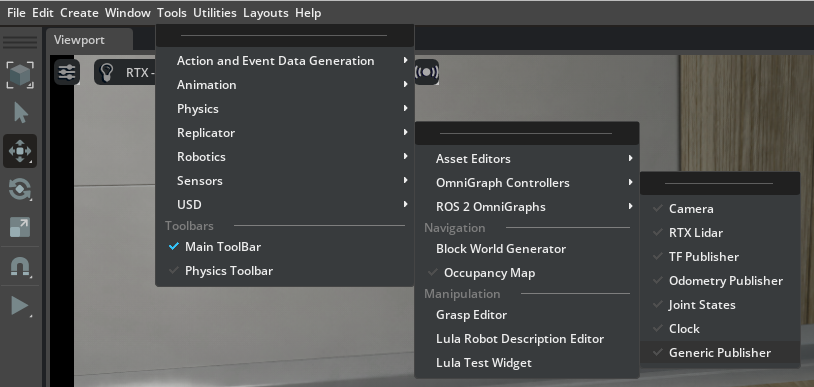
Tools > Robotics > ROS 2 OmniGraphs > Generic Publisher
7. Generic Publisher에 QoS 연결
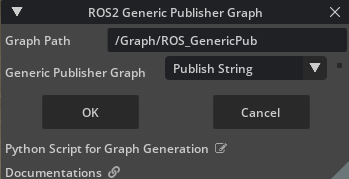
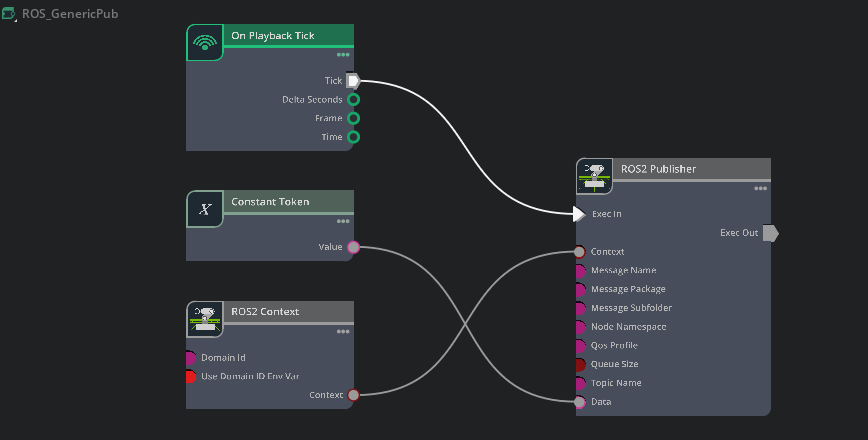
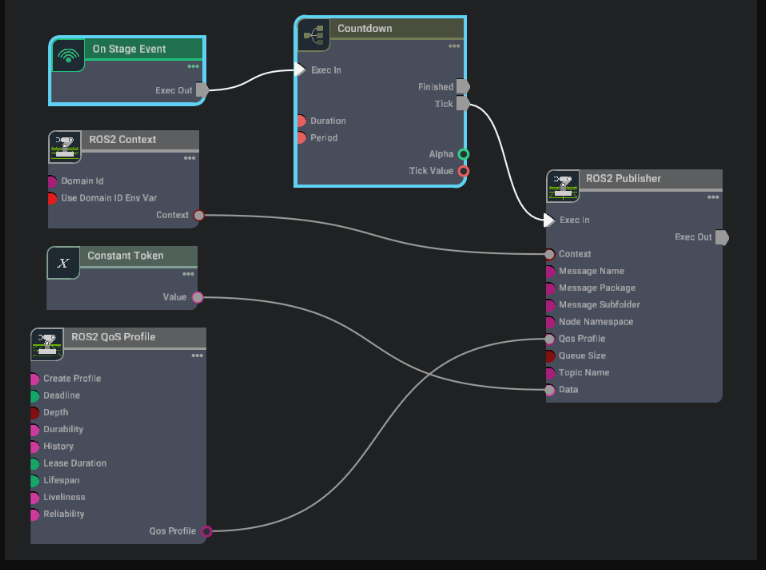
Generic Publisher를 만들고 QoS Profile 노드를 연결하면 reliability, durability, history 같은 정책을 명시적으로 지정할 수 있다.
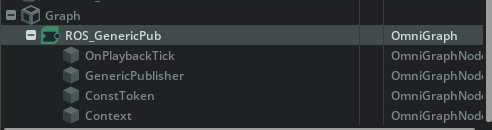
1
2
3
4
5
6
7
8
9
10
{
  "history": "keepLast",
  "depth": 10,
  "reliability": "reliable",
  "durability": "volatile",
  "deadline": 0.0,
  "lifespan": 0.0,
  "liveliness": "systemDefault",
  "leaseDuration": 0.0
}
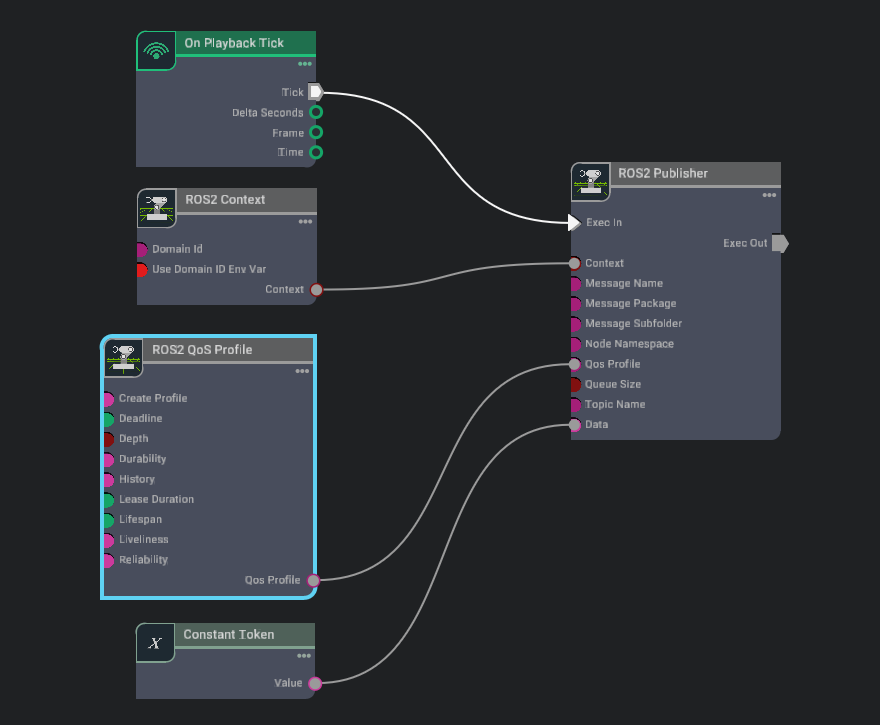
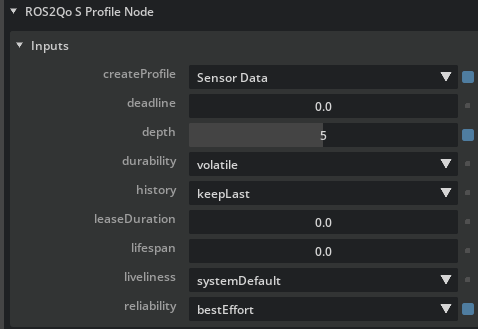
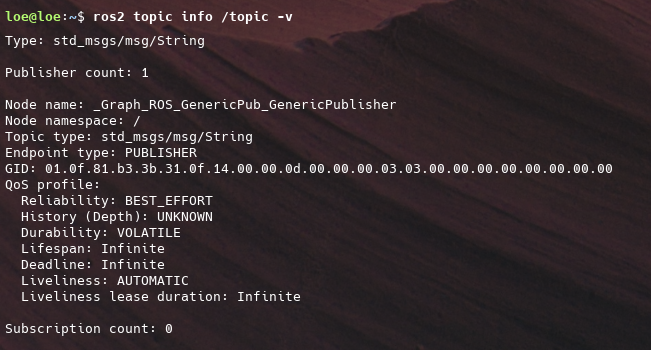
설정 뒤에는 ros2 topic info --verbose로 subscriber와 publisher의 QoS가 맞는지 확인한다.
1
ros2 topic info /topic --verbose
8. Static Publisher
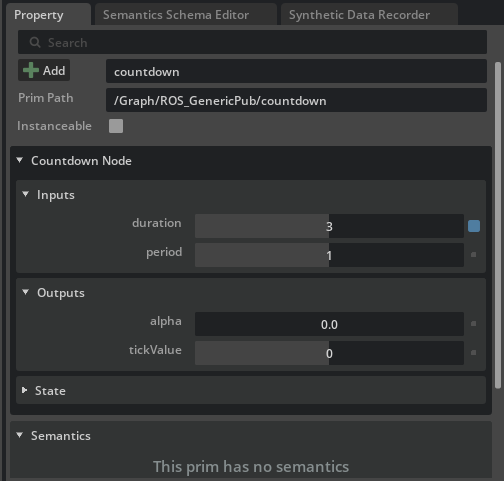
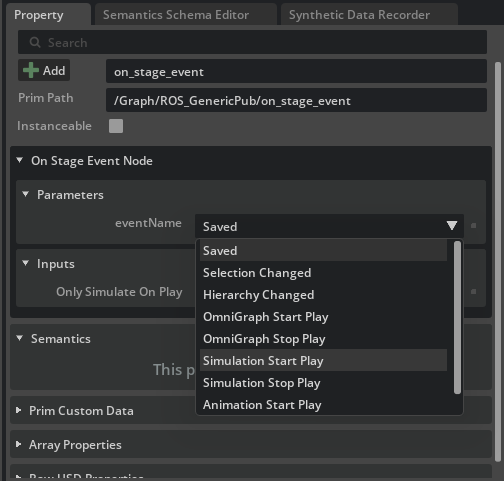
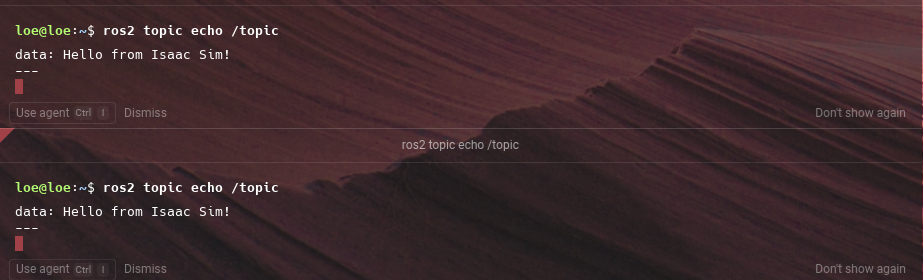
정적인 message는 매 frame 반복 publish하기보다, stage event와 transient local durability를 이용해 필요한 시점에 유지되는 형태로 내보내는 편이 적합하다.
1
ros2 topic echo /topic
1
2
3
4
5
6
7
8
9
publish rate:
  On Playback Tick
  -> Isaac Simulation Gate or frameSkipCount
  -> desired topic hz

QoS:
  ROS2 QoS Profile
  -> reliability / durability / depth
  -> subscriber behavior
정리하면 publish rate는 graph tick, sensor frame skip, simulation step 중 어디를 조정할지 먼저 정해야 하고, QoS는 subscriber가 요구하는 delivery 조건과 맞춰야 한다.